So a while back I saw a pillow at Pier 1 and LOVED it. Unfortunetly, it was kind of a little more than I wanted to spend...but I decided that I'd try and just re-create it.
Here's Pier 1's pillow, cute right?
(Don't get your hopes up too high, this one still is cuter than mine ;)
I found some fabric that was similar to the one above, and I'm pretty sure I got it at Walmart for like 2 bucks a yard, so really cheap.
*First thing first, you need to cut out a TON of strips. Depending on how wide you want your ruffles will determine about how wide you cut them. I think I did mine about 2-2.5 inches wide. Keep in mind you'll need a rotary cutter for this, it'll make it SO much easier. (When I did this project I cut all the strips by hand using pins to try and cut a straight line :/ it takes forever this way) So don't be cheap like me and just a get a rotary cutter and board. They're not too expensive.
Sorry I didn't take any pictures of these steps.
*Next step, after you've cut out all your strips (you should have a pretty big pile) you're going to want to make sure you still have enough fabric that you can cut out two squares the same size of your pillow and add about an 1-1.5 in. extra on each edge for your seam allowance.
*Now that everything is cut out, what I did was de-fray for a lack of a better word, my strips. I didn't want them to fray so I just got a lighter and lighty moved the strip across the flame. You can use a candle as well. I did this to all my strips.
*This is how I began pinning my ruffles to my piece of fabric. I started at a corner and just pinned them in place to create a ruffled look. Because my fabric wasn't the same on both sides I couldn't just continue looping it around. I had to cut it off at each end that I reached. If that makes sense.
*After it was pinned in place, I just sewed right up the top of the ruffle.
-It should start to look like this:
*Continue doing this until you've done all four corners.
*From here you're just going to start your fabric going in a cicular pattern around the middle.
-Like this, and just keep it going til' you've finished it off:
*Once you've got all of your ruffles sewn on the front now you want to attach the back to the front. For this, all you'll do it flip both fabrics inside out and sew them together, keeping in mind to keep a space open on one of the sides. Reason for this is so you can flip it back to the right side out and stuff your pillow in.
It's finished! Here's a close up of the finished product:
Here it is:
This pillow is actually easier than it may look. It's a little time consuming, but it looks great when you're finished!
-Something I might change for next time would be to get a fabric that is the same on both sides so you can create a continued ruffle look for the whole pillow. And I'd also do my strips a little wider for a fluffier look.
Thursday, May 31, 2012
Friday, May 25, 2012
Sewing Projects
I have been wanting to make a baby blanket for so long for my sister-in-law, Jamie, and since I was already in the "sewing mode" I made a few other things. I went with the whole yellow and gray theme. (love these colors)
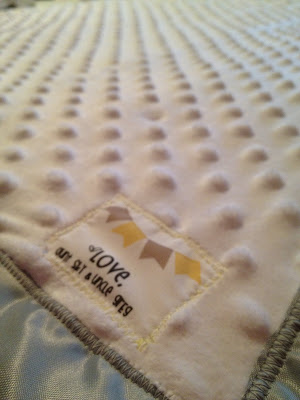
I created my own little fabric tags
I made my own chevron fabric out of stripe fabric. I couldn't find any soft minky fabric with chevron print already, so I created my own! A little bit of a headache at first, but once I figured it out it was a breeze!
I made this cute yellow and gray diaper clutch, super easy:
Another fabric tag I created
Sewed some fabric to the center of some burp cloths. Simple and easy way of sprucing these up a bit!
Found this adorable chevron sleeper on clearance at Old Navy, had to get it!
And I wrapped it up in this :)
I had so much fun doing this! I've learned that I LOVE to sew :)
Friday, May 11, 2012
Fun Trip to Utah
We went to Utah a couple of weekends ago it was so much fun to see family and friends! We were excited that we got to see my brother Blake, since he lives up in Salt Lake we decided we'd take advantage of our time up there and check out the new City Creek Mall, WOW can you say amazing? It was so much fun, I could spend days there! We walked around the temple grounds, it is so beautiful this time of year with all the beautiful flowers.
Me & my brother Blake. Love him so much!
Me & my sweet boy.
I was so excited we picked a perfect weekend to be there because it was my sister-in-laws baby shower. She looks absolutely adorable! She's due the first part of July and we can't wait to meet their cute little guy!
I have been wanting to make Jamie a baby blanket for SO long it seems, so I finally made my first attempt at a baby blanket, and well since I was already on the sewing kick I decided to do a few more things. :)
The only thing I can't claim is the cute chevron sleeper. Isn't it adorable?
I'll post more pictures of what I made later.
We also got to see Shelby and Trygve! We went to The Chocolate on State St. in Orem...WOW, they have some dang good pizookies. :) Mmm. I wished we would have taken a picture, but instead we can just drool over this amazing looking pizookie!
All in all, it was an amazing trip!
Subscribe to:
Posts (Atom)


